Saturday, November 12, 2011

Fall Mason Jars

So I totally stole this idea from Shasta @ Shasta's Frippery (By the way Shasta, I totally know you are like the only one that looks at this thing but I like to pretend that everyone and their mothers know about it)

Anywho I haven't done a craft in awhile and needed something in the house to make it feel a little more fally so I made theses.


Some cute fall mason jar candle holders.


Before adding the leaves I decided to add a tint to the jars by adding food coloring to some mod podge and painting it on the jars. I wanted them to be orange but I had no red food coloring (dang hummingbird food) so yellow it was.


All lit up. So Cute!!


And my cute turkey that I filled with caramels. yum yum!!!


Wednesday, October 5, 2011

Melted Crayon Art

Over the weekend my cousin came over for a girls day. Baked some treats, did a craft, went shopping, ate some food and did tons of gossiping. So fun!! For our craft we decided to take a whack at this melted crayon art project. These are how mine turned out.


I am totally in love with the silver crayon. So pretty!!


My smaller, colorful one from left over colors.


Almost all tutorials on how to do this say to use a hair dryer. Thanks to my wonderful hubby who let us use his heat gun. Went wayyyy faster!

Thursday, August 25, 2011

Ruffled Throw Pillows

I recently bought all new bedding for my room. I love it but it was a little dark. So I found some fabric that matched the green in the room and made some fun, ruffly, throw pillows to brighten the area up.

Before the pillows.....
See how dark


And with them
YAY!! Much better!


So cute!!


Wednesday, August 17, 2011

Purse Organizer

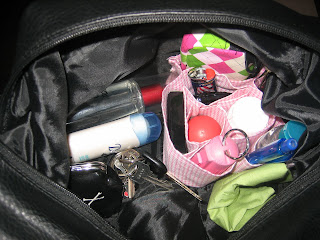
Yes, This is the inside of my purse! 


And it looks like this more often then not.


I honestly have no idea how all this stuff fits in my purse.  And see all that change, over 8 bucks worth and none of it was in my change purse. I got tired of dealing with this so I made a purse organizer.


Just a long piece of fabric that I hemmed and sewed pockets into.


Full of all my stuff


Now I have a nice organized purse where I can easily see everything.

Monday, August 15, 2011

Nature Turned Into Art

I have been wanting to do something with moss for awhile now.  I think its neat stuff and a simple way to bring nature-ish stuff indoors 


The big, ugly, empty wall that needed something fun.


What I made. I got to kill 2 birds with 1 stone, I got to play with moss and I made something fun for that empty space. YAY! 


I just painted some wooden letters. Took the glass out of 2 picture frames and glued some moss to the cardboard backing. Then hot glued my letters on.
Super Simple and Fun!


Wednesday, August 10, 2011

Lovers Lotto Cards

Mid-Week Romance lotto cards.
Super easy to make and can work for anyone with almost any subject or prizes.
Anniversaries, birthdays, any Holiday. Make a chore chart for your kids (scratch a circle to reveal their chore)... the possibilities are really endless

Here's how you make them

First print out your card. I made mine using photoshop.

Next use a white crayon and color over your prizes. Give it a generous amount.


Next take some acrylic paint (any color) and cover your prizes.


The wax from the crayon lets the paint be easily scratched off

Have fun and Enjoy!!


Friday, July 22, 2011

Cookie Bowls

Bowls made from sugar cookies?? 

Yep! And they are super yummy filled with some ice cream ( My fave: Carmel Cheesecake but sadly the store had run out when I was shopping, so I settled for Cake Batter. But oh how I longed for that Carmelly Cheesecake!)


Even better with a touch of chocolate sauce!!

To make:

Just make your favorite sugar cookie mix, roll out then cut out circles, big enough to cover the under side of a cupcake pan. And just spray pan with some non-stick baking spray. The cookies will just wiggle off if you coat the pan well.

Would also be yummy with:
 Some fruit, like strawberries & raspberries then topped with some whip cream,
Chocolate mousse
Turn into individual pudding pies
Individual cheesecakes, etc

Enjoy!!

Wednesday, July 20, 2011

Tie Dye Nail Polish


Here is a super easy and fun way to paint your nails using a cup of water to get an awesome marbling effect

What you need:

Paper towel
Toothpicks or Sewing Needle
Scotch Tape
Dixie Cup or other small cup you don't mind ruining (fill with luke warm water)
Nail Polish (base color, several colors to tie dye with and a top coat if wanted)
Nail Polish Remover & Cotton Swabs


Start off by painting your nails with your base color. I used white to really help the other colors to "POP".

After that is completely dry cover your fingers on all sides of your nails with your tape.


Make sure you start with warm water not cold, or it won't work right.

In your cup of water drip a drop of nail polish, one color on top of another to create a bullseye.
I used Believe It, Do It (Pink), Respect The World (Blue), and Virtuous Violet (Purple) from Nicole by O.P.I.


Next take your toothpick and very lightly drag the colors together


Pick your favorite area of your design and place your nail flat down on the nail polish and press down into the water. Hold there while you take your toothpick and swish it around in the water and around your finger to collect any excess polish. Slowly pull out finger to see your design (FUN PART!!)

Make sure your start each nail with clean water. That doesn't mean you have to get new water for every nail. Just drag a toothpick or needle threw the water, it will collect any leftover polish. 

See why you need to tape your fingers! It can get kinda messy!

After all your nails are done & dry carefully peel off tape and use a cotton swap & nail polish remover to get any polish that might of gotten pass your tape.

 All finished!! Now I got some pretty cool and psychedelic nails to rock!! SWEET!!


Monday, June 20, 2011

Decadant Peanut Butter Cookies

These Peanut butter cookies are so yummy and easy to make!!


Make your favorite peanut butter cookies. Dip both ends of a cookie in some dipping chocolate then sprinkle some roasted chopped peanuts on top.


So so so so  yummy and such an easy way to make a plain cookie way more special!


Monday, June 13, 2011

Repurposed Shirts

I recently did a spring cleaning of my closet. I went thru all of my cloths and decided to get rid of everything that not only didn't fit or were just old, but things that I felt didn't fit my age anymore. I want a more grown up, sophisticated look and the two shirts I use for these projects definitely didn't fit that, but were still kinda cute. So I made some fabric flowers and a puppy bed out of them.


The fabric flowers that turned out super cute!!

And here's how I made them


First cut out 13 to 14 circles from your fabric


Next take 1 circle and lay it flat on your table, take 2 more circles, fold each in half and secure both in the middle onto your 1st circle. (You could totally use some hot glue to secure all your fabric pieces down, but I was making this for my puppy and felt that sewing them would be an all around better idea)


Next take 2 more circles folded in half and secure them down going in the opposite direction as the firsts 


Then take 4 circles and fold each in half, then in half again, secure in middle.
Continue this step until all you circles are have been used, give flower a good fluffing and your done.

On one of the flowers I stitched a clip to the back, which makes it great to use anywhere as a cute accessory.


Place on a bag, purse, gift box...


Straight in your hair, on a headband, on a necklace....


Or as a cute, fun brooch. The possibilities are literally endless!!


This one was made with love for my cute puppy


She is about ten years old and loves to lay out side and just bask in the sunshine. She would just usually lay on the ground but with her getting older she needed something that was a little softer. So with the same shirts I made a slip for a old couch pillow and added the flower to make it a little more girlie for her.


Now she can take a comfy nap in the sun! Love Her!!